Thank you guys, now I just have to deliver, eh?

I'm certainly no "renaissance man", but I'll go with the "multimath"

As you said I couldn't let go of the tank and with the fake effect proved functional I was back on track!
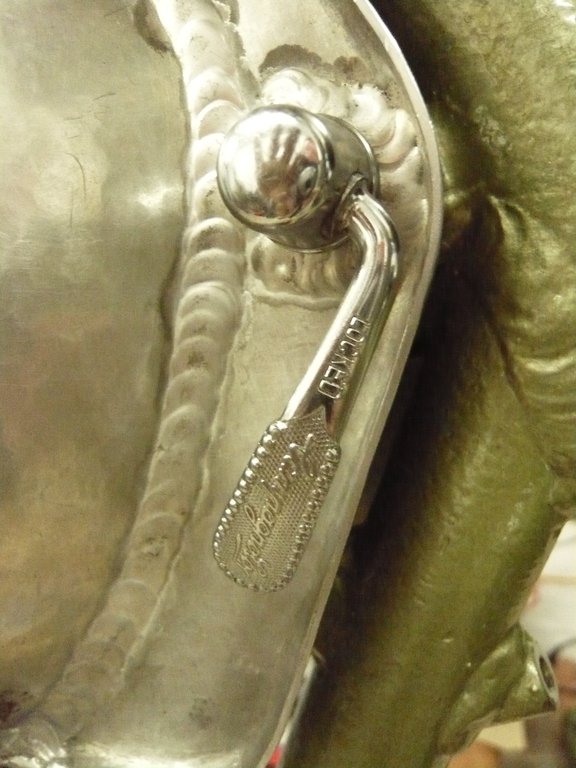
Beeing a fan of these easy to maintain solutions on the Enfield I wanted to push it even further. So I wanted the tank to be removable without the need of tools. In the back a rubber band is used, but in the front there's a bolt. I could have used winged or knurled nuts, but I came up with a better idea!
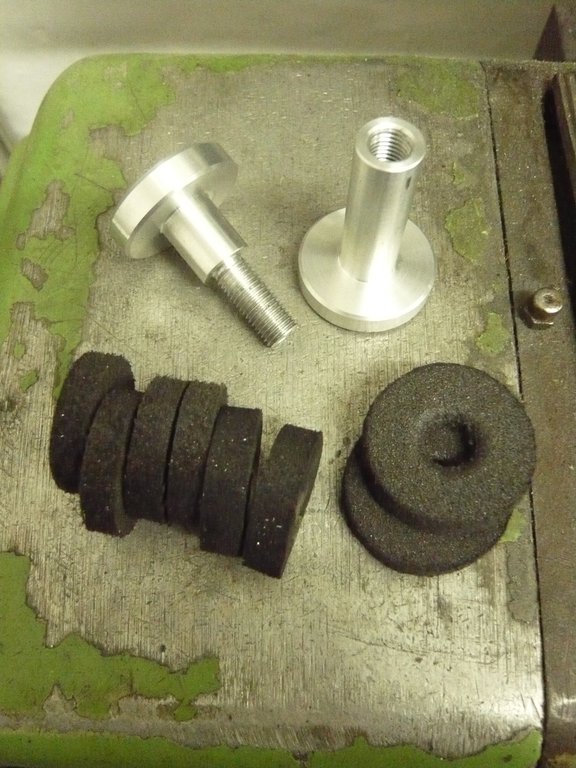
But first, I wanted the tank mounted securely and with a big contact area, to spread any forces as wide as possible as well as reduce any vibrations to a minimum. Both would mean death to any sheet aluminium part if not taken care of.
So I made a two piece lug and a set of foam washers, acting as a cushion. These were cut out roughly and then trimmed on the lathe using sanding paper:
 >>Link<<
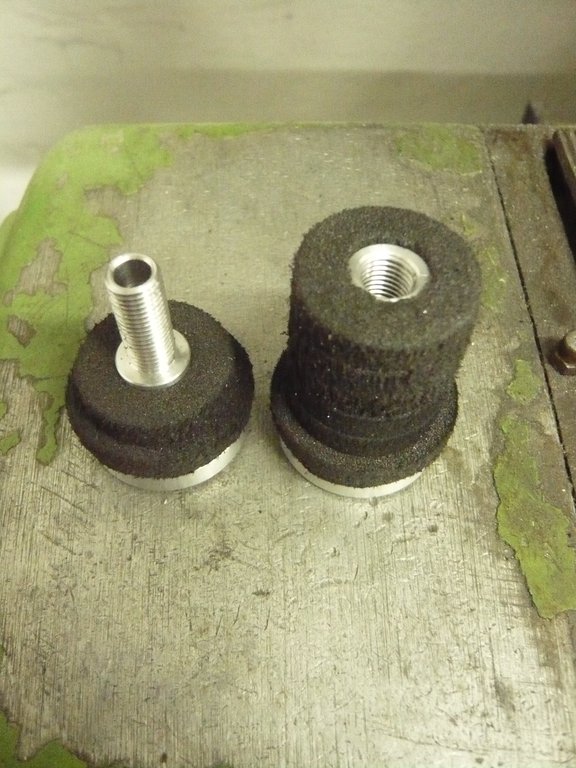 >>Link<<
Mounted to the frame:
 >>Link<<
And here comes the fun part:
 >>Link<<
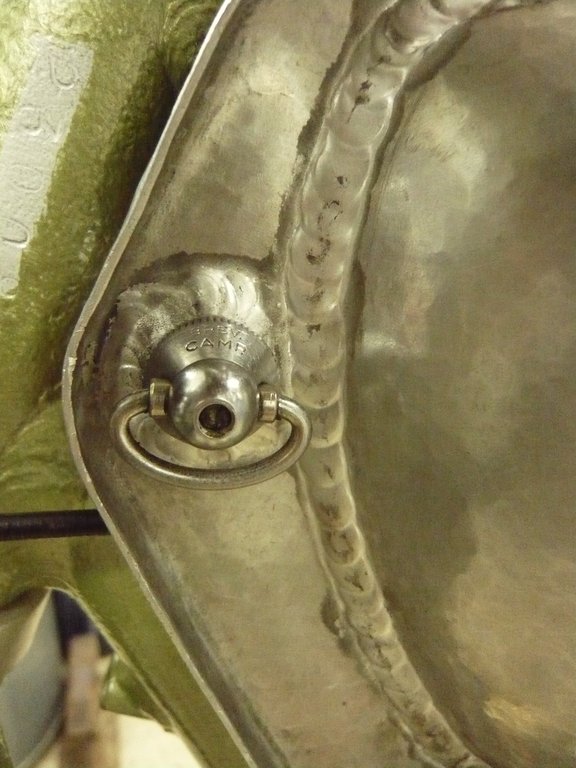 >>Link<<
Do you recognize, what this is?

This makes any tool obsolete while providing a good clamping force.
Another thing that would have irritated me, was pulling the gas hose. Good thing the tap has a 1/4-BSP thread. Ferrules with nurled nuts are available used for welding gas connectors!
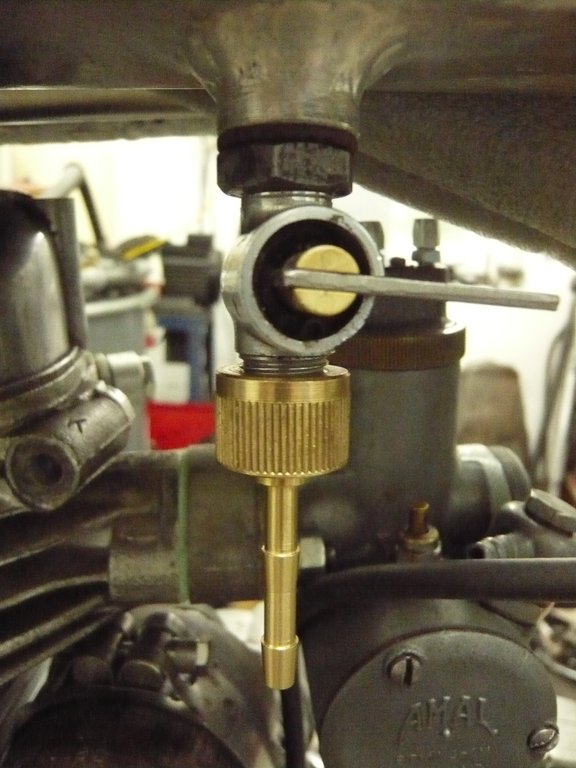 >>Link<<
I turned down the second... erm...hook-part(?!) leaving only one in the front and bent the ferrule ~90° to match the carburettor connector, avoiding any loops routing the gas line:
 >>Link<<
And here's the rubber mount for the rear. This really is just the O-ring seal of a defective water pump and had just the right dimensions:
 >>Link<<
Now the tank can be removed effortlessly and in a matter of seconds, exactly what I wanted!

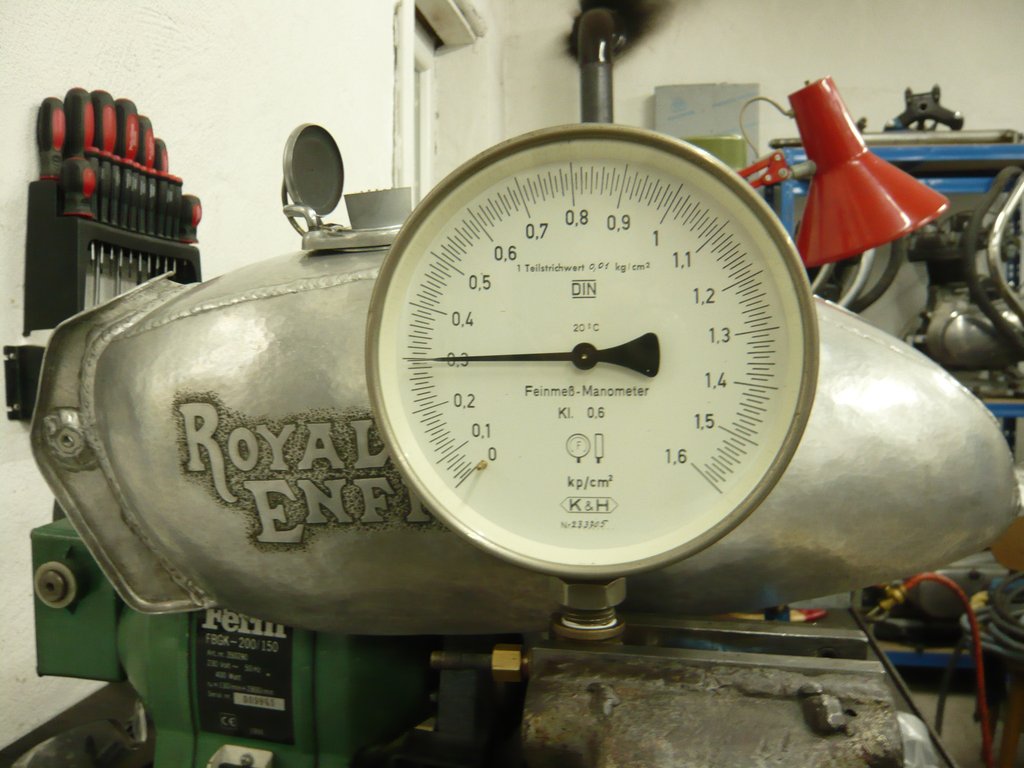
So the last thing to do before filling it up with gas, was a pressure test. I gathered some parts I had lying around, to make a simple test rig. The German TUeV (technischer Ueberwachungsverein - "technical supervision society") requests all non pressurized tanks and reservoirs to be tested at 0.3 atmospheres to make sure they're airtight and safe to use in traffic. While that's not my main concern, it's still a good rule to follow for testing. So I pressurized the tank to 0.3 bar and let it set over night. An hour later, no drop in pressure could be recognized. After ~24hours there was still 0.14 bar left. A good value in my opinion, considering some leakage from the (old) valve, rubber plug and screw connections:
 >>Link<<
So that's it with the tank for now, but there's still more to come. Stay tuned!
Andreas
 Topic: Project "Laubfrosch" - the trials hybrid (Read 48018 times)