Author Topic: Indian Chief build, looking for Information  (Read 102559 times)

0 Members and 1 Guest are viewing this topic.

grumbern

  • Grand Gearhead
  • *****
  • Posts: 667
  • Karma: 0
Reply #165 on: July 09, 2017, 06:20:56 pm
Congratulations!
I've been looking for a firm to laser cut the connectors and am currently waiting for a reply. Work on the "knitty kitty" is proceeding, but I am still facing some difficulties. It can't take too long anymore though.
So long,
Andreas


grumbern

  • Grand Gearhead
  • *****
  • Posts: 667
  • Karma: 0
Reply #166 on: July 17, 2017, 08:53:09 pm
Alright, the madness continues!
Everything takes a little longer as planned and expacted, but it proceeds.
The seat is ready so to say regarding the metal work and the braces and brackets riveted and welded. Where spotwelds were placed, I used hole welds, because I don't own such utility. It looks and bears just the same. The braces and central bracket in the front are welded, latter as well and the rear brackets only riveted.
As rivets I just used 6mm steel rod. I already did this with success, but with two pieces of steel. Now with one piece only 1mm sheet metal, I had some reservations and because the proximity of the welds also some trouble. It worked out after all.

The rear brackets have to be bent down a little unfortunately. How I will do that, without wrecking everything, I still have to see. Still four holes are missing for the pop rivets, that will later hold the upholstering in the back and front. On the sides it will be held by clamps, that will be clipped on the fold. That isn't as wavey as it looks on the pictures, by the way, because I sanded it a little and there are still some parts with surface rust at the dings emphasizing them.
But now fore some pics :-*


I already bought the paint and cushioning is coming next!
So long,
Andreas


grumbern

  • Grand Gearhead
  • *****
  • Posts: 667
  • Karma: 0
Reply #167 on: July 21, 2017, 05:09:54 pm
Seat is sandblasted and painted. Tomorrow I hope to be able to make the cushion.

Also, I have the order confirmed for the wiring harness connectors, that'll be done in about two weeks.
So long,
Andreas


grumbern

  • Grand Gearhead
  • *****
  • Posts: 667
  • Karma: 0
Reply #168 on: August 01, 2017, 10:53:28 am
Seat sand blasted and painted:


Starting on the cushioning with a stencil:


And cutting it using an improvised hot wire:


The rough result:


After it's trimmed and brought into shape using an angle grinder, I put it on the seat and pulled it down using a pice of cloth:


Still looks a bit high to me, but further reducing the foam cushion I guess would result in less sitting comfort?!
What do you think? It'll probably go down a little with a tight upholstering instead of the flabby piece of cloth.

Maybe some adjustments, but for now it feels pretty good:


So long,
Andreas


grumbern

  • Grand Gearhead
  • *****
  • Posts: 667
  • Karma: 0
Reply #169 on: August 03, 2017, 07:11:41 pm
She's alive!

First start


Well, hardly, but she is ;D
« Last Edit: August 04, 2017, 04:14:23 pm by grumbern »


mattsz

  • Grand Gearhead
  • *****
  • Posts: 5,525
  • Karma: 0
  • moto-gurdyist
Reply #170 on: August 04, 2017, 01:56:06 pm
She's alive!

http://www.youtube.com/watch?v=DkcUcgHBJuk


Well, hardly, but she is ;D

Your link is broken, double check it...

Random thoughts:

- You can quit your gym membership now.
- Be careful of setting your knees on fire.
- Awesome!


grumbern

  • Grand Gearhead
  • *****
  • Posts: 667
  • Karma: 0
Reply #171 on: August 04, 2017, 04:19:16 pm
Checked it!

It now runs good. The problem was the power supply and after changing it to a propper battery, it now fires up first (or second) kick! Some adjustments still to do and obviously a lot of work around the engine, but I already love it more than ever! Such a nice and powerful sound!

-> Second start <-


I really didn't notice the flames until I saw the video ;D


Arizoni

  • Grand Gearhead
  • *****
  • Posts: 7,412
  • Karma: 2
  • "But it's a dry heat here in Arizona
Reply #172 on: August 04, 2017, 11:38:08 pm
Sounds good.

Are you getting any oil up in the rocker arms?  The one place you showed them, they seemed to be a bit dry.
Jim
2011 G5 Deluxe
1999 Miata 10th Anniversary


grumbern

  • Grand Gearhead
  • *****
  • Posts: 667
  • Karma: 0
Reply #173 on: August 05, 2017, 07:48:51 am
Yes, there is. I had to clean the downtube after that, because of the oil spitting out. You can also see the left header smoking from time to time. That's when a drop of oil hit it ;)
I guess it'll have to run a little longer and with closed covers for the oil to get everywhere?!
Andreas


mattsz

  • Grand Gearhead
  • *****
  • Posts: 5,525
  • Karma: 0
  • moto-gurdyist
Reply #174 on: August 05, 2017, 11:25:11 am
it now fires up first (or second) kick!

Oh well, back to the gym, then...

Nice work - I'm really enjoying following along on this project!


Adrian II

  • Grand Gearhead
  • *****
  • Posts: 4,140
  • Karma: 1
  • Sharing my ignorance with anyone who needs it
Reply #175 on: August 06, 2017, 12:01:23 am
Good stuff!  8)

How many RPM was the steering damper knob doing?  :P

A.
Grumpy Brit still seeking 500 AVL Bullet perfection! Will let you know if I get anywhere near...


grumbern

  • Grand Gearhead
  • *****
  • Posts: 667
  • Karma: 0
Reply #176 on: August 06, 2017, 10:32:40 am
I'd guess about 20?! ???


grumbern

  • Grand Gearhead
  • *****
  • Posts: 667
  • Karma: 0
Reply #177 on: September 24, 2017, 09:10:52 pm
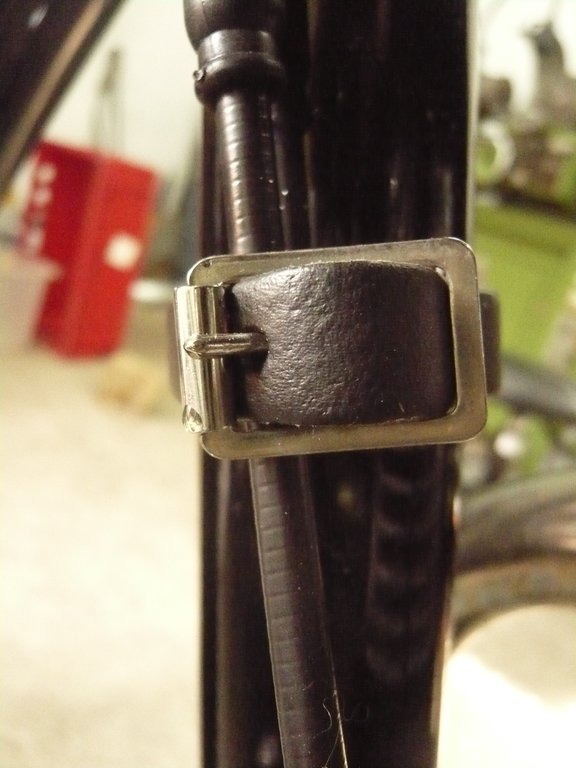
Some nice details. Cablestraps old fashioned style 8) :


With the seat:


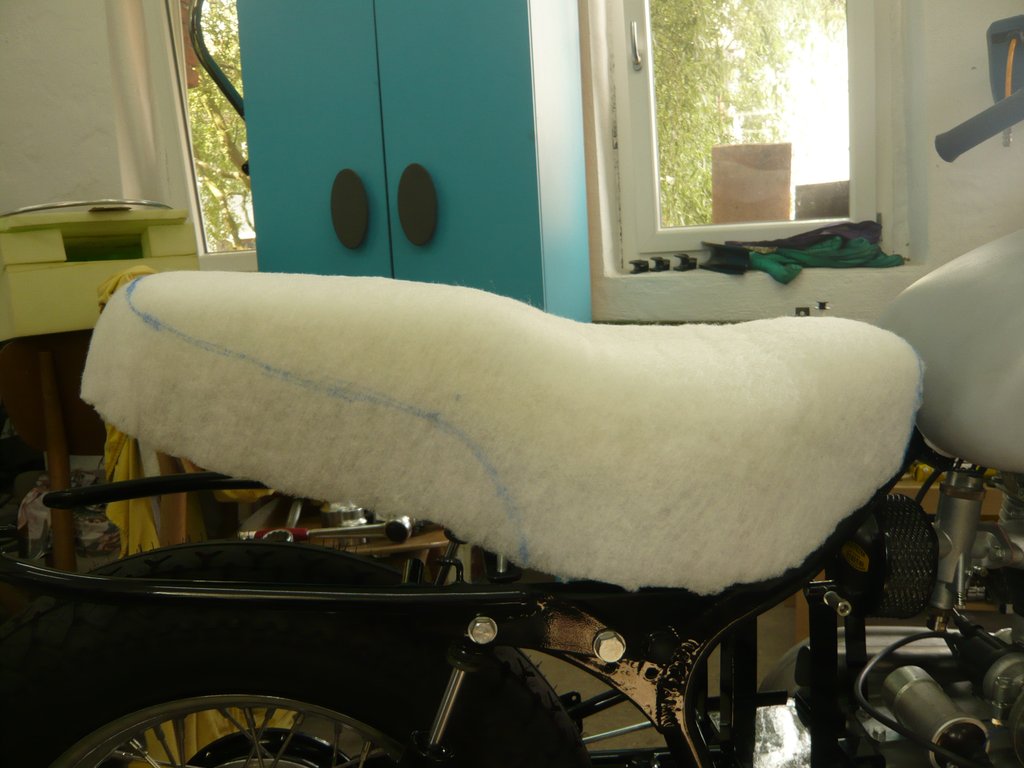
On top of the foam a liner is placed to conceal minor unevenness:


With lots of delay I got my laser cut connectors. So far they seem fine, but need a tin coating.


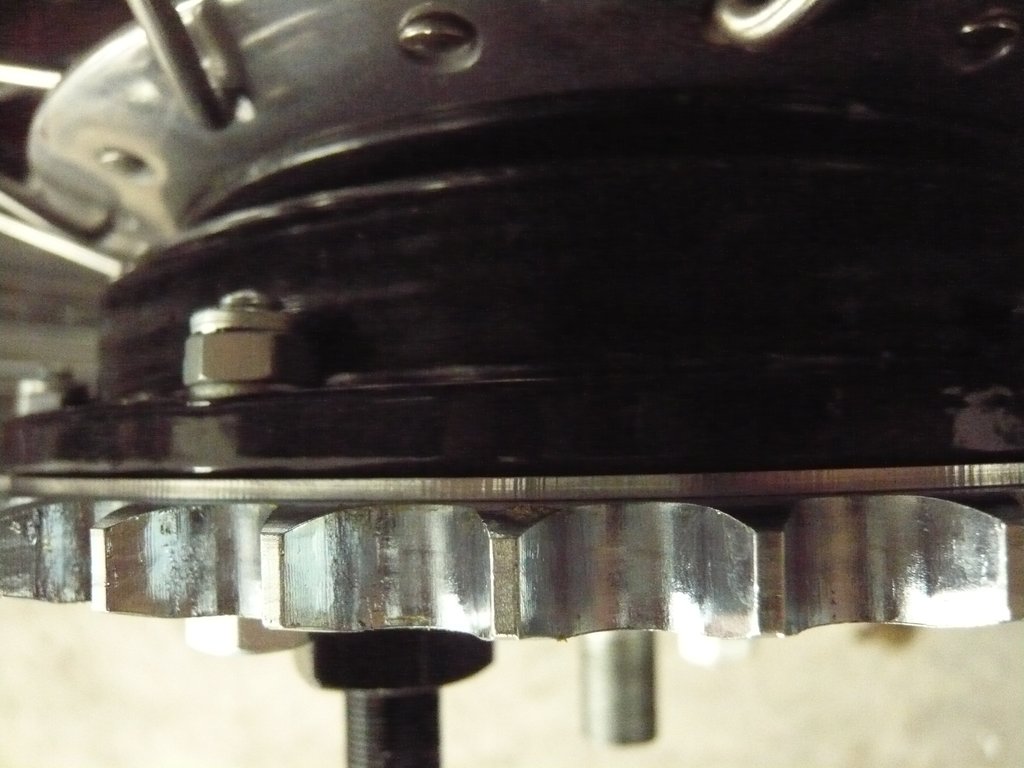
Also I could pick up some parts from zinc plating. Some parts were for my Kreidler, but the Chief wasn't to get nothing and besides some bolts and small parts, there was the rear sprocket:


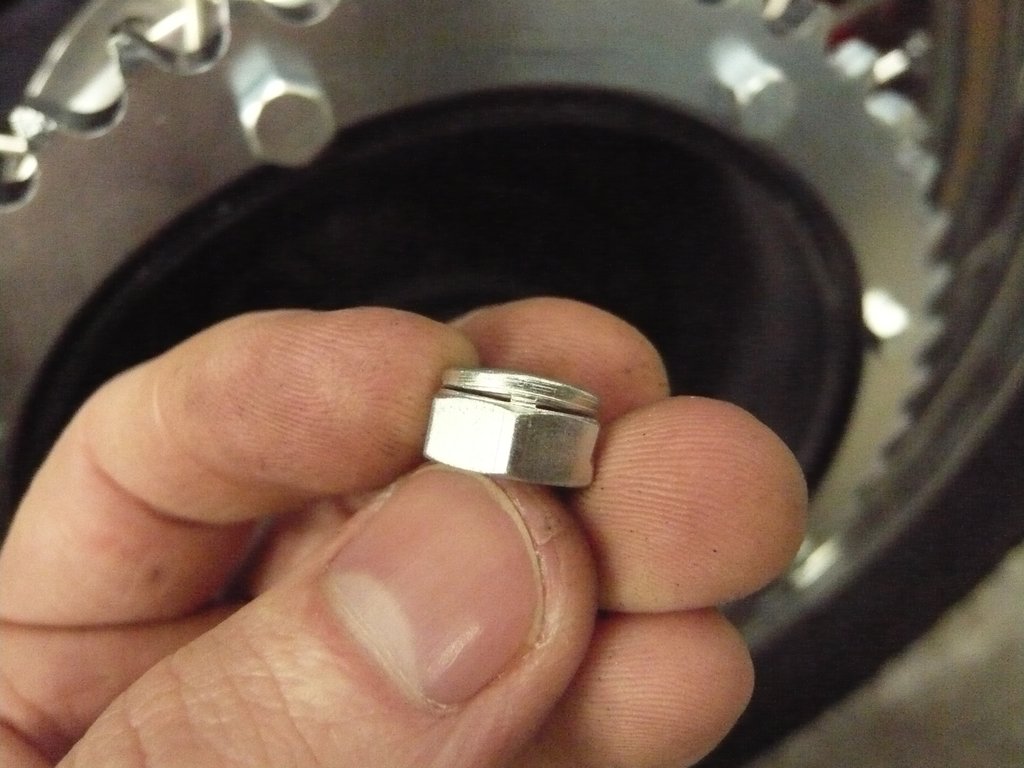
Nice detail - lock nut the British way:


Aluminum spacer for the sprocket:


A big thank you goes out to Bernhard of DWS, who made me a sweet upholstering for my seat! It arrived on friday and I was lucky to have a lot of clamps:


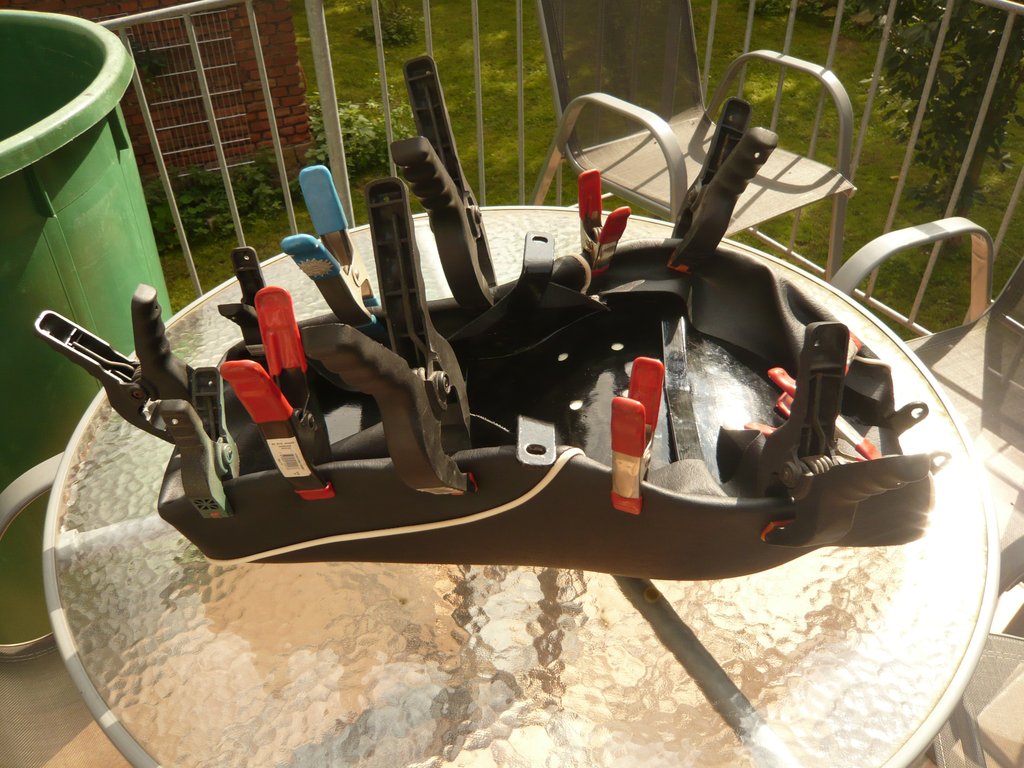
The steel clamps however to fix it are rubbish. I got them on it, but still am a little distrusting:


The ends still need some adhesive and rivets, but yet I mounted the seat to the bike to see how it looks:


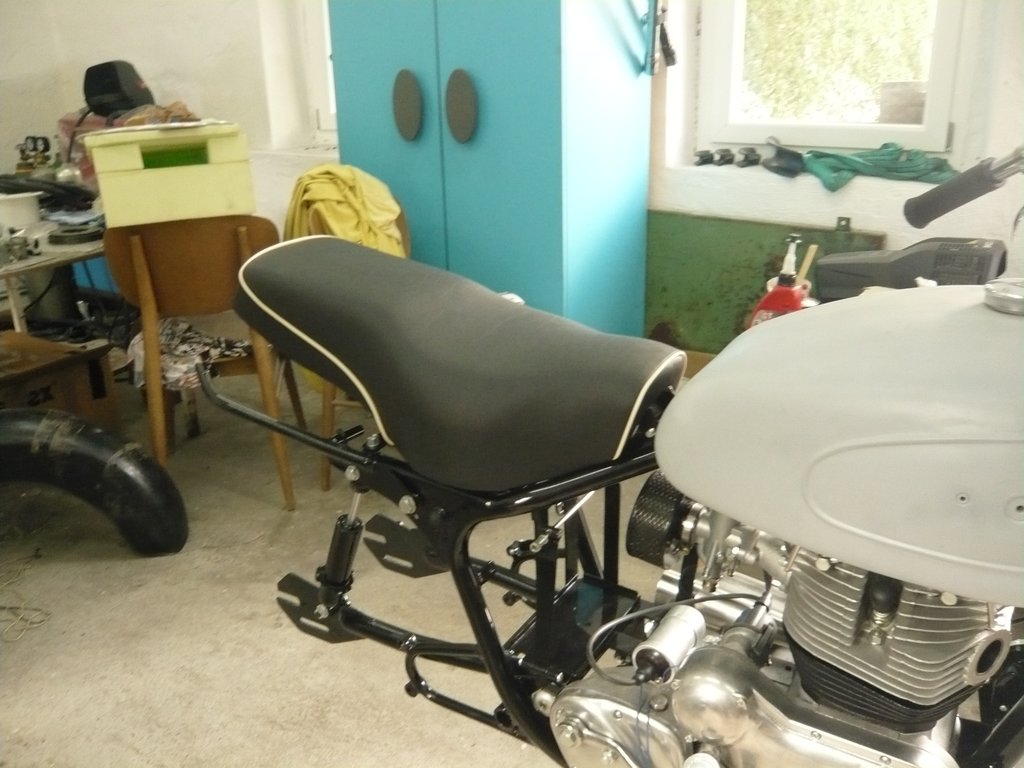
What can I say? Looks nice, is very comfortable and I am really curious, how it will feel to ride!

The wheels are off right now, because I still wait for new brake liners to arrive!
So long,
Andreas


Adrian II

  • Grand Gearhead
  • *****
  • Posts: 4,140
  • Karma: 1
  • Sharing my ignorance with anyone who needs it
Reply #178 on: September 25, 2017, 11:07:20 am
Very nice job with the seat repair, it looks more authentic than the Hitchcocks' late 1950's replica seat.

A.
Grumpy Brit still seeking 500 AVL Bullet perfection! Will let you know if I get anywhere near...


grumbern

  • Grand Gearhead
  • *****
  • Posts: 667
  • Karma: 0
Reply #179 on: September 25, 2017, 03:54:46 pm
Thanks, that was my goal!
Today I got the brake shoes back:


As they were still a little too big and out of line, I put them on the lathe and trimmed them a bit:


The sprocket carrier and brake drum are back on the bike and the chain measured - unfortunately it's just in the middle of pitches so I need a cranked one  >:(


So long,
Andreas