Author Topic: Indian Chief build, looking for Information  (Read 102621 times)

0 Members and 1 Guest are viewing this topic.

High On Octane

  • Grand Gearhead
  • *****
  • Posts: 6,075
  • Karma: 0
Reply #180 on: September 30, 2017, 10:37:04 pm
Really coming along nicely!  Can't wait to see it all finished up and complete.  You are definitely spending more time building your bike than I did on mine, and it shows.
2001 Harley Davidson Road King


grumbern

  • Grand Gearhead
  • *****
  • Posts: 667
  • Karma: 0
Reply #181 on: October 03, 2017, 11:31:47 am
Thanks, I too am really looking forward to the first ride. The front mudguard still waits at the previous owner for me to pick it up - but I have to do it with the otherwise finished bike, that's the condition.

Yesterday I ordered the mufflers and some small parts from HMC, and as I decided to use the old exhaust pipes, started working on these.

One hat a massve ding, right in the bottom bend as well as a crack.


The other one had a bad kink, right where the footrest is:


I got them out mostly, the remaining dings will have to be taken care of at the plating shop.
So long,
Andreas


grumbern

  • Grand Gearhead
  • *****
  • Posts: 667
  • Karma: 0
Reply #182 on: October 08, 2017, 12:24:10 pm
Yesterdy I was able to pick up the chrome plated parts for the Chief:


Turned out gorgeous and 150€ seems quite reasonable!
I adjusted the exhaust pipes an Friday (I got the mufflers from HMC and so that came quite handy) and left them right there. Now I wait for the estimate.
Gruß,
Andreas


grumbern

  • Grand Gearhead
  • *****
  • Posts: 667
  • Karma: 0
Reply #183 on: October 12, 2017, 03:55:36 pm
Nothing much has happened, but I started on the rear footrest mounts:


Still needs deburring and tapping as well as turning the end conic. But first I need a 3/8"-, or 7/16"-BSC tap.
So long,
Andreas


Oranator

  • Scooter
  • **
  • Posts: 15
  • Karma: 0
Reply #184 on: October 23, 2017, 03:38:14 pm
Hi Andreas,

How is the "knitty kitty" coming along.

I need a wire harness, could you please send the old one back for my used parts shadow box.

Oran


grumbern

  • Grand Gearhead
  • *****
  • Posts: 667
  • Karma: 0
Reply #185 on: October 23, 2017, 07:07:28 pm
Hi Oran,
the "knitty kitty" will take a little longer, but I have your harness ready with exception of the connectors. I screwed up with the tin plating. I'll try to get it ready by the week and if not, I'll send it to you like it is and you can use different connectors.
Sorry for the long wait, I'm a little depressed at the moment thinking of all the time and money that went into these damn connectors and now they're all like useless and need some distance from that, to catch some new enthusiasm :-[
But, either way, by the end of the week your harnesses will be on the way back to you!
Best wishes,
Andreas


grumbern

  • Grand Gearhead
  • *****
  • Posts: 667
  • Karma: 0
Reply #186 on: October 30, 2017, 12:16:56 pm
Now that my foot rest holders are almost ready (deburring and polishing has yet to be done, a 7/16-BSC tap is now part of my inventory and did it's job), I naturally wanted to try on the mufflers. And right here it was where the little gremlins did their work!

Correct spare part number, but the mount does not fit. The outer diametre is too small, the inner one too big. All in all too thin and weak, must be cheaper ::)


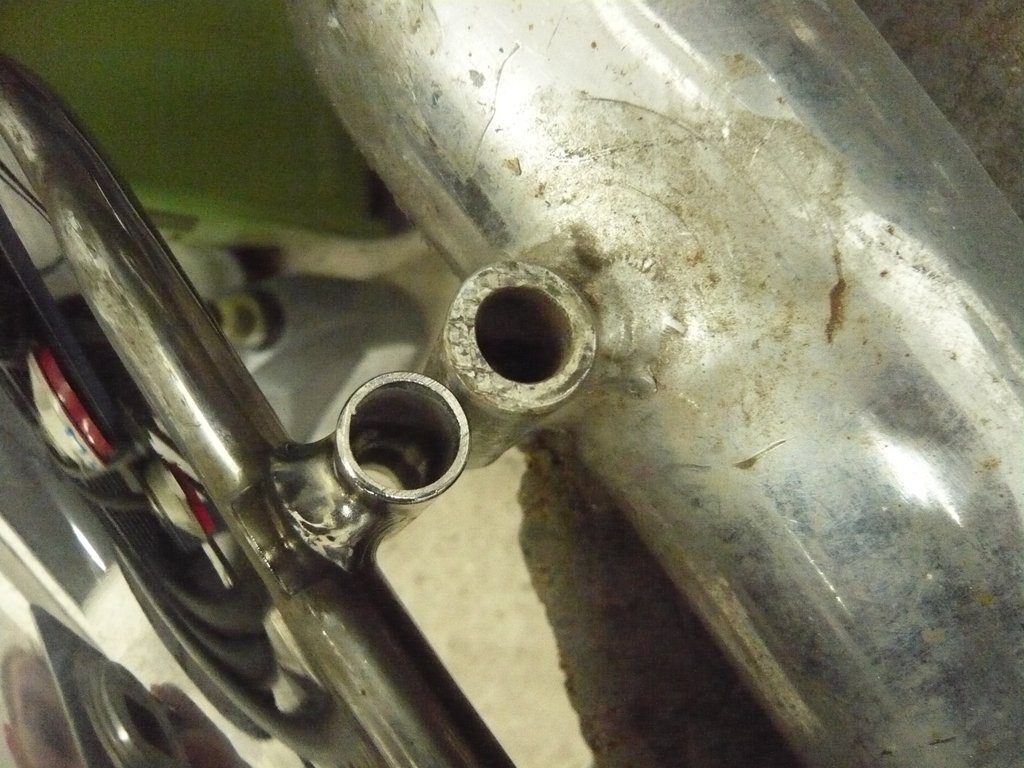
This resulting in the muffler sitting lose and not adjusting to the right position, but also can not be fastened as much, because I fear that pipe to flatten. The fact of the footrest holders creating a step there I will considder a minor flaw.

What really bums me out is that:


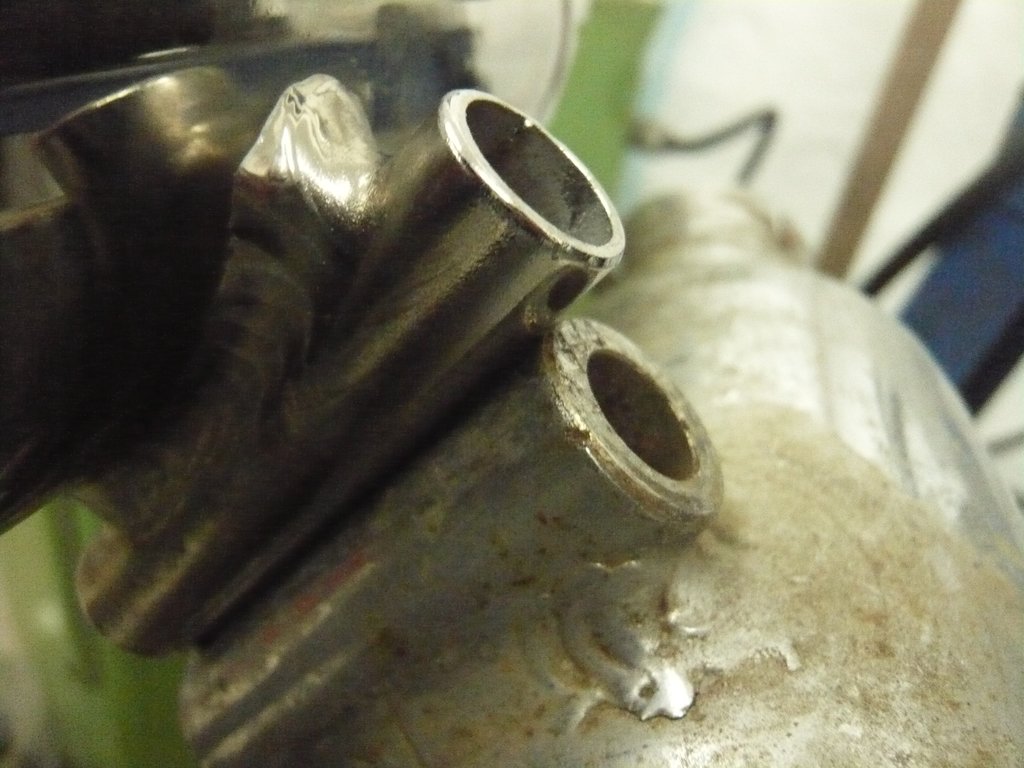
The pipe's too long! Hurray, the studs specially bought for that won't do anymore, because they're consequently too short!


The fun is endless. Why make replicas and mess about with such a nonsense?! I mean, that really is rubbish. I surely won't considder the option of shortening the pipe on a chromed new item. Sending it back won't bring me any further as well, as there's no adequate replacement and I don't like the fact of the shipping charges blown in the wind (as they're not tooooo cheap).

I'll contact HMC on that, but the solution will probably be turning a longer, matching stud from stainless steel, with a thicker shaft in the area of the muffler mount, to keep the play between accepable borders.

Next: The "quickly detatchable rear hub" on the Chief is more of a bad pun, than a reasonable "feature".


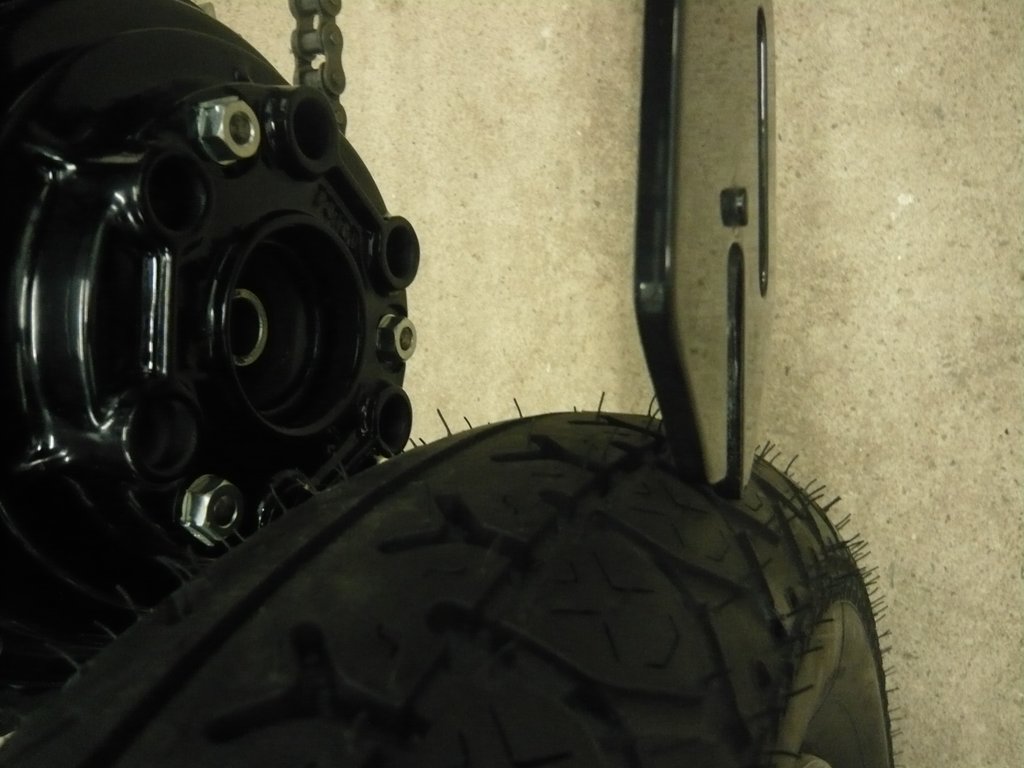
The fat tyre makes mounting the rear wheel impossible, without removal of the Sprocket with cush-drive and rear brake. Even without any air, the space is not enough to squeeze the wheel in there. They could have use a system much less complex than this one. Well...

Today I will pick up the downpipes from chrome plating.
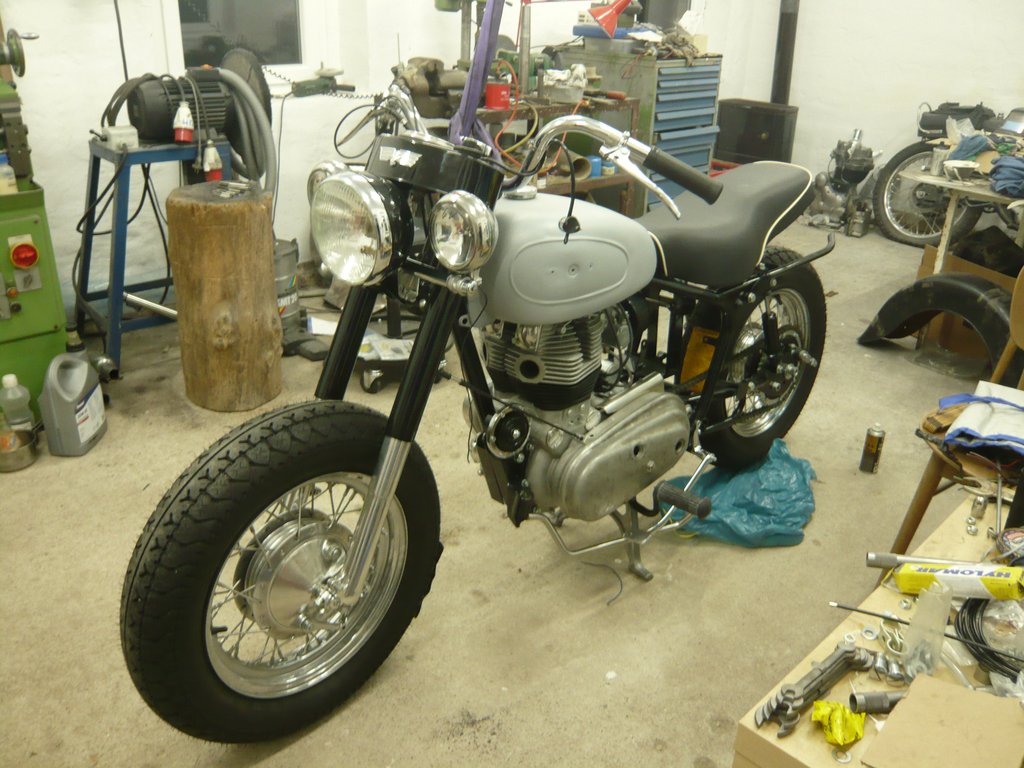
For conclusion here's a little impression:


So long,
Andreas
« Last Edit: October 30, 2017, 12:48:52 pm by grumbern »


grumbern

  • Grand Gearhead
  • *****
  • Posts: 667
  • Karma: 0
Reply #187 on: November 04, 2017, 08:43:36 am
The downpipes and right muffler are mounted.
I made a fitting stud from an M12 bolt's shaft, with 7/16-BSC on the ends.


The second one has yet to be done.
So long,
Andreas


grumbern

  • Grand Gearhead
  • *****
  • Posts: 667
  • Karma: 0
Reply #188 on: December 25, 2017, 07:35:41 am
Well...., after several failed attempts to "spin" them and therefor massive lack of motivation, I jumped my shaddow and did the rear shock shrouds. I'll spare you the attempts, but would like to mention, that I did the second one three times, because the knurls did not do like I wanted them to >:(

At the beginning a length of stainless tubing, cut with a hand saw and "straightend" with the lathe:


The disk is part of the remains of a failed spinning attempt, but for this it'll do the job:


Both fixed together...


...and welded:


Too bad, those beads are to disappear:


After the knurling. I reworked the unfinished knurl you see on the left afterwards:


Now that's it so far, and all that times two:


More to come in two days. Have some peaceful hollidays!
So long,
Andreas


grumbern

  • Grand Gearhead
  • *****
  • Posts: 667
  • Karma: 0
Reply #189 on: December 26, 2017, 09:48:02 pm
And off we go once more!
Made a stencil of the old part first:


Transferred it with marker and made first cuts. Fortunately I hadn't turned it out yet and so I was able to clamp it using an M10 bolt as before - just the other way round ;)


One careless moment and it was done  :o :


Fortunately I was generous with my markings and so I could still save it, working very one-sided on the "cogs" ::) :


Not quite done yet, but it's coming along:


Today there was no time for more, so it's going to take 'til Thursday for more updates.
So long,
Andreas


mattsz

  • Grand Gearhead
  • *****
  • Posts: 5,525
  • Karma: 0
  • moto-gurdyist
Reply #190 on: December 26, 2017, 09:56:30 pm


grumbern

  • Grand Gearhead
  • *****
  • Posts: 667
  • Karma: 0
Reply #191 on: January 13, 2018, 07:25:46 pm
And on it goes.

The shrouds on the very bottom (there are 4 on each damper!) are made from aluminium and did not only have bad scratches and dings, but also were corroded:


I fixed them as good as I could and sanded them, to create a somewhat decent surface:


For the upper "chrome plated" shrouds I cut some lengths of stainless tubing and trimmed them on the lathe:


Using a hydraulic press, I  wided them up a little and made a collar:


I used a big washer as a stencil to cut  two discs from 1mm stainless sheet metal using a plasma torch (that simply was the fastest way):


Tremmed them on the lathe and welded them to the shrouds:


After that I turned down some 1/10mm (the tubes had a 1.5mm wall thickness), turned the "bore" and sanded them. The collars kept most of their 1.5mm as can be seen:


Tomorrow it's polishing and "trying on" :)
So long,
Andrea


High On Octane

  • Grand Gearhead
  • *****
  • Posts: 6,075
  • Karma: 0
Reply #192 on: January 13, 2018, 11:37:20 pm
Impressive as always.  I always enjoy reading about and seeing your fab work.  Great work Andreas.
2001 Harley Davidson Road King


grumbern

  • Grand Gearhead
  • *****
  • Posts: 667
  • Karma: 0
Reply #193 on: January 14, 2018, 10:48:52 am
Thanks, always a pleasure! ;D


grumbern

  • Grand Gearhead
  • *****
  • Posts: 667
  • Karma: 0
Reply #194 on: January 14, 2018, 06:37:08 pm
This afternoon I made some progress.
First sanding the aluminium shrouds:


Then polishing the stainless ones (they somehow look better in real life...):


And then did some work on the primary cover.
That's what it looked like after some cleaning and a little sanding:


And this after a good hour with the sanding star:


I am always amazed, how easy and with how little removal of material even deep scratches just vanish. This was only the first round with a 120 grain, but now, as the surface is clean, the other ones (240-400-600-800) will not take longer than this. And then it needs polish.
So long,
Andreas