Author Topic: Farkle Number Two Successfully Installed  (Read 5789 times)

0 Members and 1 Guest are viewing this topic.

wildbill

  • Grand Gearhead
  • *****
  • Posts: 3,282
  • Karma: 1
Reply #15 on: October 08, 2013, 01:29:04 am
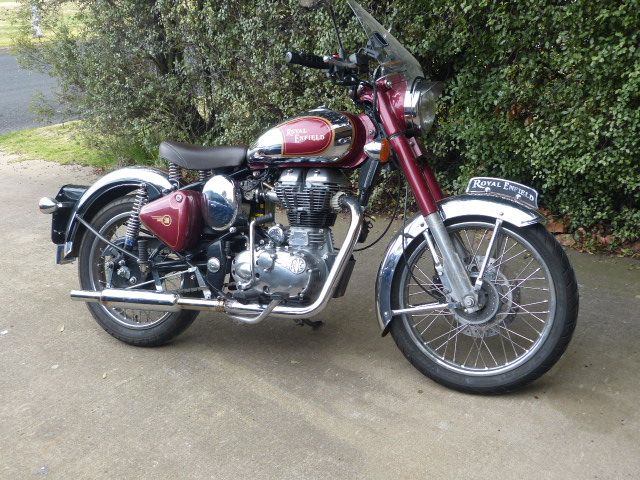
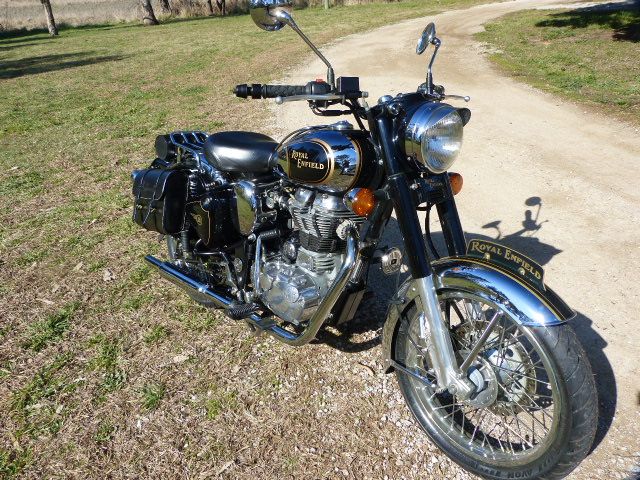
here's a bit of info for other "dyi" depending on the style of the plate there may be no need to remove the front wheel on your bike. both my c5's had front plates....that said unless you have sturdy type hands!

1.run the tape down the centre of the guard
2.set up your plate position as discussed further up the thread.
3.undo and remove all 8 bolts plus the disc
4. pull the guard up and then slide a piece of flat timber between tyre and guard
5. drill the holes for the plate. the timber will hold the guard steady and stop the drill bit from puncturing the tyre.
6. remove timber -set plate in position - pull up the guard and tighten the nuts up.


High On Octane

  • Grand Gearhead
  • *****
  • Posts: 6,075
  • Karma: 0
Reply #16 on: October 08, 2013, 02:54:00 am
Looking good Dan!  I'm really liking the brass.   :)
I still need to get you your spare rain suit back to you too.

Scottie
2001 Harley Davidson Road King


tooseevee

  • Grand Gearhead
  • *****
  • Posts: 4,576
  • Karma: 1
  • Everybody's havin' them dreams
Reply #17 on: October 08, 2013, 03:44:23 am

It is not a cloth tape.

Cloth tapes will get snagged on the drill bit and either break the drill bit or wind up on the flutes jerking the drill bit all over the place.  Please don't use a cloth tape for locating a drilled hole.

              Cloth tape measure, not cloth masking tape. Tailors use them & my mom (as I mentioned previously) always had a couple around the house when I was a kid. She made clothes for me (& herself) in the '40s until I stopped her   ;)  "Ma! Enough! I'll buy my own shirts now"!
RI USA '08 Black AVL Classic.9.8:1 ACEhead/manifold/canister. TM32/Open bottle/hot tube removed. Pertronix Coil. Fed mandates removed. Gr.TCI. Bobber seat. Battery in right side case. Decomp&all doodads removed. '30s Lucas taillight/7" visored headlight. Much blackout & wire/electrical upgrades.


DanKearney

  • Grease Monkey
  • ****
  • Posts: 352
  • Karma: 0
Reply #18 on: October 08, 2013, 04:29:47 am
Looking good Dan!  I'm really liking the brass.   :)
I still need to get you your spare rain suit back to you too.

Scottie


No worries Scottie.  If the weather is good this coming weekend, maybe we'll meet up for a ride.


Cheers,


Dan K.


Arizoni

  • Grand Gearhead
  • *****
  • Posts: 7,412
  • Karma: 2
  • "But it's a dry heat here in Arizona
Reply #19 on: October 08, 2013, 05:34:32 am
My mom probably lost over a dozen of those cloth measuring tapes from her sewing supplies before she finely figured out her little boy was 'borrowing' them for various projects.
After she put her foot down forbidding my borrowing and made a lasting impression on me
the mystery of the disappearing tapes was solved. :(

The main reason I mentioned that the blue painters tape was paper is because the way I read some of the posts, others were talking like it was cloth.
Jim
2011 G5 Deluxe
1999 Miata 10th Anniversary


heloego

  • A 2x4. My kingdom for a 2x4!
  • Grand Gearhead
  • *****
  • Posts: 2,497
  • Karma: 0
  • USA '12 C5, '06 ElectraX
Reply #20 on: October 09, 2013, 03:46:46 am
Quote
1.run the tape down the centre of the guard
2.set up your plate position as discussed further up the thread.
3.undo and remove all 8 bolts plus the disc
4. pull the guard up and then slide a piece of flat timber between tyre and guard
5. drill the holes for the plate. the timber will hold the guard steady and stop the drill bit from puncturing the tyre.
6. remove timber -set plate in position - pull up the guard and tighten the nuts up.

Sheet Metal Layout 101.  :)
Excellent procedure for those who haven't done it yet. Protect the Guard and the tire!
'18 Bonneville T-100, Blue/White
'12 C5 Classic
'06 Electra X AVL w/32mm Mikuni and Gold Star system.