Well, I've cluttered up this thread plenty, but I want it to be useful, so here's the latest...
I was able to remove the "Warning Indicator Assembly" using Jack's Windex idea (thanks, Jack!!! Also works for removing stubborn wedding rings - no, not for the reason you think

), so I've taken some photos with everything apart.
I originally removed the speedo because I couldn't get to the two headlight-flanking pilot lights, and also because I wasn't able to get to the three colored speedo indicator lights easily. As you can see, the bulb sockets are enclosed in a black plastic housing which inserts into a hole in the speedo body - the housings can be carefully pried out, or carefully gripped with pliers and pulled out.
The socket housings stay with the sockets:
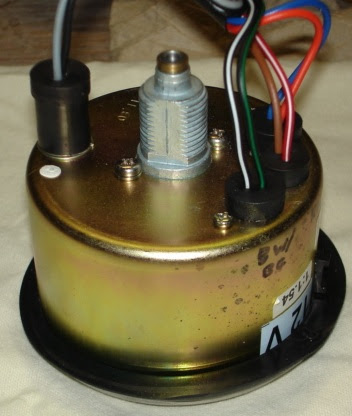

I assumed that the Warning Indicator Assembly was the same, and now we know the result of that assumption! It is difficult to see beneath it, even with the speedo removed. It looked like I should be able to remove the socket housings in the same way, but not so. The assembly has three tubes that extend below the body, and the bulb sockets fit into those tubes.
The socket housings stay on the assembly. The sockets have a rubber boot which cover the socket housings, holding them in place (quite tightly) and protecting them from weather, I guess. Sorry the pics are bad, but if you squint you can at least see the difference between this assembly and the speedo:
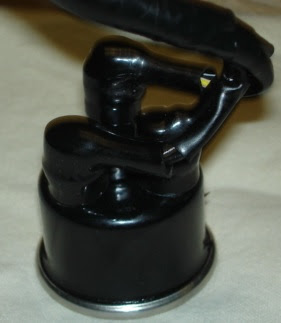

Because I couldn't budge the Warning Indicator Assembly from the nacelle, I went for the closest bulb first, the low fuel indicator, and tried to wiggle the socket housing out of it, like I did with the speedo's bulbs… essentially, I was trying to remove the non-removable socket housing, and I broke it. Not completely, though - I wasn't pulling straight down on the housing, I was trying to wiggle it down so I snapped it sideways. It's now loose, but one side is still attached (I'm hoping I can glue it back together):

But at least I knew now how it worked. With the assembly still in the nacelle, I was able to use a flat screwdriver to slowly and carefully work the rubber boot off the socket housing by sliding the lip down in tiny increments, working my way around as much of the boot as I could reach, which was about half way:

I did this on the already broken housing, and I didn't make it any worse. I did the same with the MIL light, the second-easiest to reach, and was able to do the same. The parking light is the hardest to reach, but now that I've cheated and have the Warning Indicator Assembly out, they're
all easy to reach.
Now that I have changed all the bulbs with the Warning Indicator Assembly off the bike, I see that it's unlikely that I would have been able to do it any other way. Once I got the rubber boots off, the Low Fuel socket came right out of its housing, but the other two were so tightly wedged in there, I had to use a real solid grip on the assembly, and pliers to pull
hard the sockets, with a twisting motion, straight out of the housings. If I ever need to change a bulb there again, I'd definitely remove the assembly - Windex and a little wiggling and persuasion helped me pull it right out of the nacelle (the rubber bushing came right out with the assembly).
BTW, in case my super-glue repair doesn't work, our hosts supply the whole assembly/bulbs/harness as a unit, for $22. Not the cheapest lesson learned, but all in all that's not bad...
 Topic: Are there any brighter neutral light LED replacement bulbs? (Read 26644 times)